Digging, Dividing and Storing
“The Winkie Way”
Do I have to Dig Dahlias Each Year?
It is advisable to dig the tubers annually.
As a last resort they may be left in for one season, but you run the risk of them rotting.
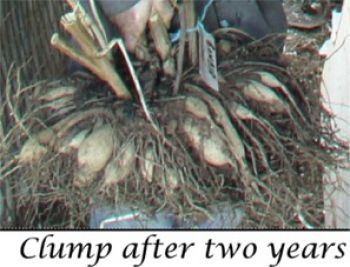
If the clumps are left in you can expect a huge task dividing the clump because tubers multiply & create a huge problem.
Looking at the picture below I ask
“Where would I start?”
Cutting Down
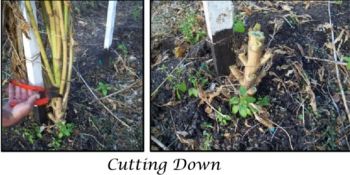
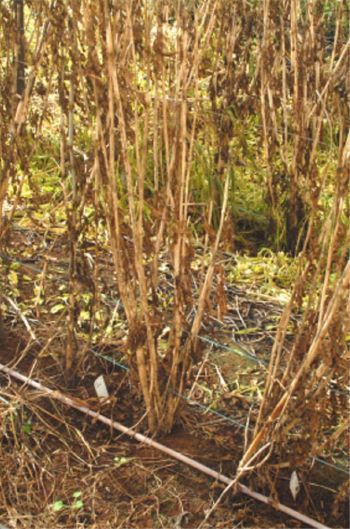
Cutting Down can start after they have died down and the stalks are of a yellow straw colour.
They can be cut down after the first frost but can be left in the ground until Aug/Sept.
They can be cut down when the laterals are green, it is advisable to cover the cut stalks to protect from the elements.
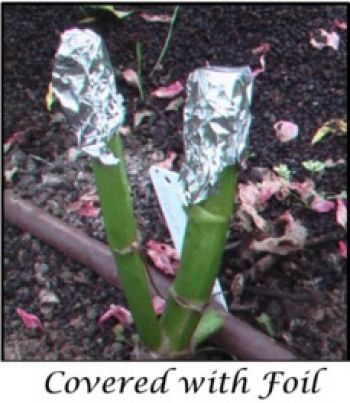
Aluminium Foil is ideal.
Those growing in areas of higher rainfall are well advised to dig the clumps late May early June.
The benefits of planting on a raised bed provide better drainage and less chance of your tubers rotting.
Digging the Clump
It is important to know that the mature plant underground has a number of thickened roots called Tubers.
The tuber provides food for the development of the shoot for next year’s plant and the neck is the conduit for providing that vital food until the roots develop and the plant becomes self-sufficient.
The tubers are connected to the base of the plant which is called the crown.
This connection is called the neck, and they come in different thicknesses.
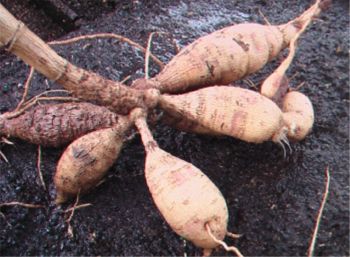
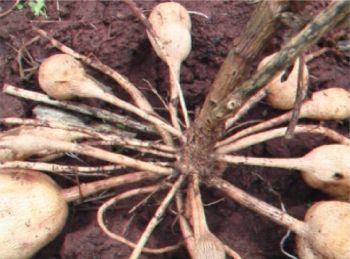
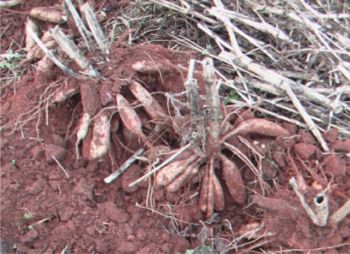
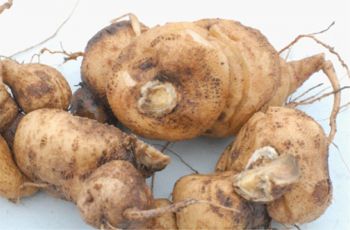
Tuber Clumps come in all Shapes & Sizes
When digging it is important that all of the tuber ends are cut before the clump is lifted.
With a shovel/spade (Not a Fork) cut all-around the base of the plant about 400mm (18 inches), this will cut all of the long feeder roots. If these are not cut you are likely to break the neck of the tuber when lifting out of the ground.
Do not use a fork because it does not cut the feeder roots.
When digging the Clump it is very important not to damage the necks.
The use of two spades is advisable because that helps prevent damage.
As you lift the clump from the ground it is best if you can put your hand underneath preventing the tubers from sagging & breaking the neck.
When washing the clump do it while the clump is on a mesh table, again protecting that neck.
Remove the old stalk as close to the clump as possible.
Cut the clump in half with secateurs or a large knife.
Then remove the tubers one by one making sure you retain part of the old plant; this is the bit that supports the eye. No Eye - No Shoot - No Plant - No Flowers.
Make sure you do NOT lose the name tag!
Step by Step digging the Clump
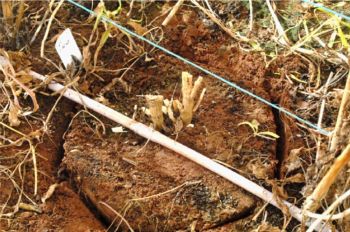
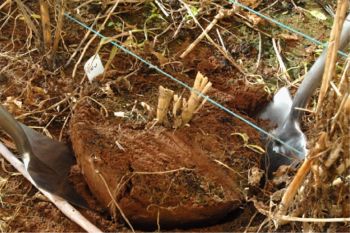
Ready to Cut Cut down With Feeder Root Severed Lifting with a Spade each side
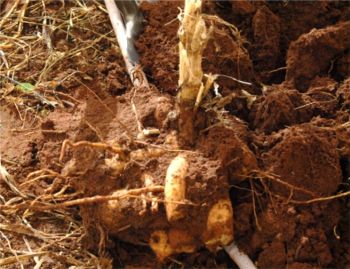
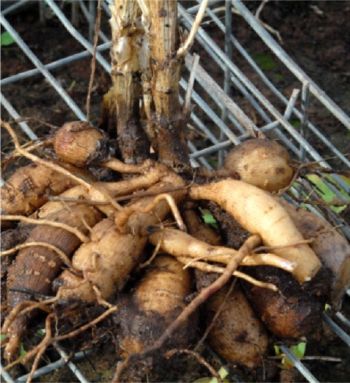
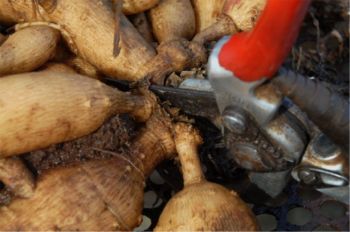
Ready Dug Clump Wash down Remove Tubers retaining the Eye
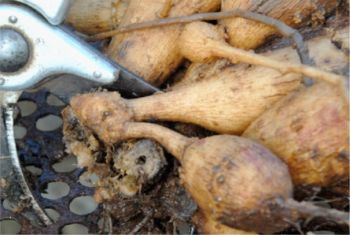
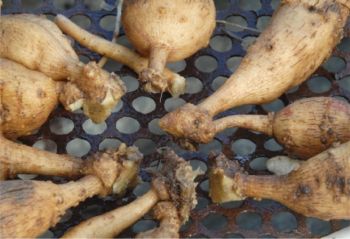
Cutting retaining the Eye Six tubers ready for storing

Cutting off the Tails delays the tuber shooting. The tuber has to callous before new roots are established.
I have found that the tail is where the new roots first appear getting the tuber off to a good start.
The tail is only cut off if it has been damaged or showing the first signs of rot.
Beware
If you dig a clump of Tubers with multiple growths, looking like these dispose of the Clump and change the soil around the infected plant.
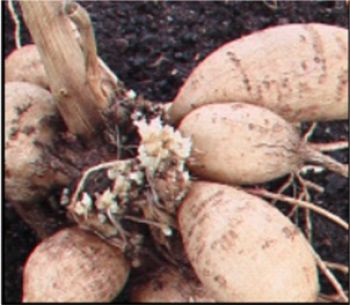
Infected Clump
This is a form of a bacterium. It's full name is ' Agrobacterium tumefaciens'., now it is called only 'Agrobacterium'. In some species, these tumors are called 'Crown-galls'. These bacteria live in the soil, it is important to dispose of the soil around the infected dahlia’s Root Zone.
I stick by “If in Doubt – Throw it Out”
Storing the Tubers
I prefer to cut the clump up because it reduces the chance of losses, if the tubers are left in a clump, when one tuber rots the whole clump is likely to be lost.
Tubers are place horizontally on a bed of a mix of 50% hardwood sawdust & a good potting mix that is approx. 50mm thick. I like to put all the eyes along the edge; this eliminates the chance of any damage to shoots when you are trying to remove a tuber to give to a friend.
All cultivars are well divided and labelled.
The medium is kept just damp NOT wet.
A light sprinkling of snail bait is spread across the benches.
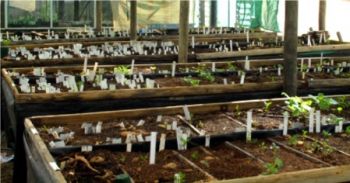
Benches at Winkie
Alternative Methods for Storing
Storing in Polystyrene boxes is ideal.
They can be stacked on top of each other helping to save space.
Cover the drain holes in the bottom with two thicknesses of newspaper, this will stop the loss of medium but still maintains good drainage.
Tubers are place horizontally on a bed of a mix of 50% hardwood sawdust & a good potting mix that is approx. 30mm thick. I like to put all the eyes along the edge; this eliminates the chance of any damage to shoots when you are trying to remove a tuber to give to a friend.
If putting more than one Cultivar in a box it is advisable to put in a divider.
Labelling of Cultivars is important. Some like to label each tuber with an indelible pencil or permanent marker.
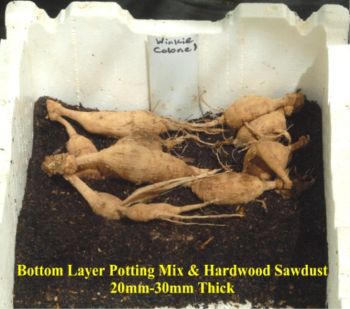
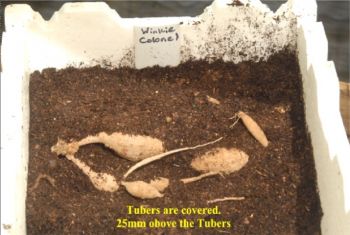
Polystyrene Boxes are Ideal
Divided Tubers can be stored on a wall in plastic shopping bags with potting mix.
Always leave the top open. DO NOT tie the handles in a knot sealing the bag.
Keep the medium just damp, NOT wet.
This is good it you are short of storage space.
As well as writing the Cultivar Name on the bag put an additional label/tag in the bag.
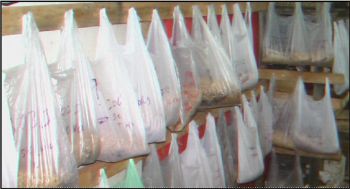
Hanging on Wall Saves Space
Alternatively (At the risk of the whole Clump Rotting)
Clumps can be placed under a citrus tree (or similar) or along the side of a shed or fence. If using this method it is advisable to leave the soil on the Tuber Clump.
This method is not advised in areas where you get huge frosts.
The advantage of storing in a clump is that when they shoot you can see the eyes very easily.
Make sure snail bait is spread around the clumps.
Enquiries and comments to
John Menzel-
john@winkiedahlias.com
08- 85837369 0408 837369