Planting & Growing
“The Winkie Way”
“If you can grow Tomatoes you can grow Dahlias”
Dahlias grow successfully in most parts of Australia.
Postiton
Ideally Dahlias require a position that has Morning Sun & Afternoon Shade.
One can cover the patch with Shade Cloth. I have found that the White or Sandstone of 50% knit is most favourable, producing very good plants, the darker shades such as green & black produce plants with lots of growth at the expense of blooms.
Dahlias can be planted amongst other plants such as small shrubs & Roses. As a guide leave at least a metre (3 Ft.) from the perimeter (Drip Zone – Outer Ring) of the Shrub/Rose.
Planting Time
Dahlias can be planted from late August to New Year depending on weather conditions in your area. Keep in mind if you plant too early you run the risk of Frosts & if you plant too late you may have a heat problem.
As a good general guide for most areas a week either side of the Melbourne Cup works well.
Tubers planted around Melbourne Cup can expect blooms from late January through March and April depending when the first frosts arrive.
Preparation
Dahlias will grow in most soil types provided they are well drained.
The preparation of the soil can start in August
with the digging over of the patch, digging in any green
crop that may have been planted.
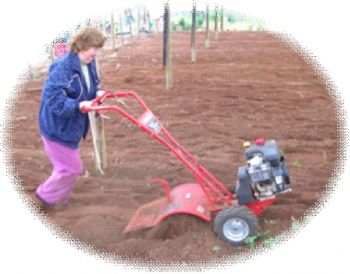
Ideally you can add liberal amounts of animal manure as a top dressing after the first dig. September is time to dig everything in giving the time for the organic matter to be broken down into a form that is more readily available to the plants.
If you are in a wetter area it is advisable to grow your plants on raised beds/mounds.
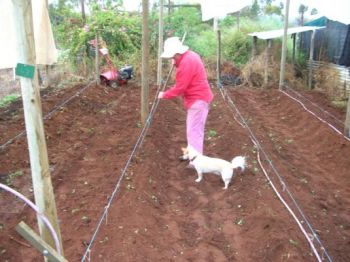
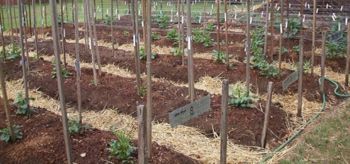
Raised Beds at Winkie Raised Beds at Catherine Field NSW
The soil needs to be prepared with plenty of organic material such as animal manure or a Complete fertilizer such as Complete ‘D’ two weeks prior to planting.
Fertilizer Requirements
Dahlias like a good lot of animal manures such as Sheep & Cow which give optimum results.
The addition of Seaweed based liquid products applied with a watering-can can be incorporated with your organic material to assist with better root development. In addition I apply soil microbes in the form of Go Go Juice that assists the further breaking down of the organic material.
Horse manure is OK but does not have the nutrient levels of Sheep & cow that have higher levels of potash.
Warning. Pig & Poultry manures are very strong & can adversely affect the plants growth.
Be cautious using of some of the liquid supplements, which are very high in Nitrogen. Nitrogen is good in the plants early growth until about January/February. If high levels of nitrogen are continued after that you will run the risk of affecting the keeping qualities of your tubers.
I use a lot of foliar applications with a NPK that is low in Nitrogen & high in Phosphorous & Potassium. The one I use very successfully has an NPK of 5 – 10 – 27. These are applied from the time first colour appears which is in mid-January. I apply this “Weekly – Weakly” until the end of March, resulting in good strong stems and more intense vibrant colours.
Planting
When planting tubers always make sure they are planted horizontally (NOT Vertical) so that they have approx. 10cm of soil over the top of the tuber.
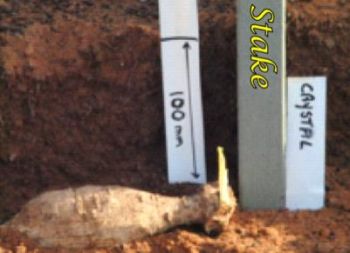
If using stakes, plant the Stake First & place the eye end of the tuber approx. 50mm (2 inches) from the base of the stake.
It is not necessary to put any fertilizer in the bottom of the hole. The nutrients are only leached away from the tuber and out of the root zone.
I always water the tubers in ensuring the soil is damp. I like to use a sea-weed based solution applied with a watering can because it assists with better root development.
The rate I use is about 20ml per ten litres of water.
Traditionally most reference books published in the Northern Hemisphere instruct you not to water until the shoots appear.
In most parts of Australia if the soil is not kept damp they will NOT come up.
Supporting Plants
Supporting plants from an early stage is strongly advised. Support can be done in several ways. I prefer to use the trellis system. Traditionally Dahlias are grown supported by a Stake.
ALWAYS plant the Stake first; it also assists with setting up your Patch.
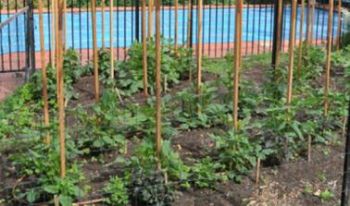
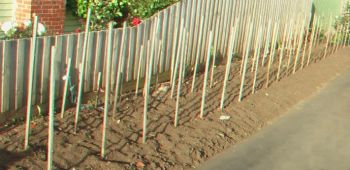
Well Set-up Patches with Stakes
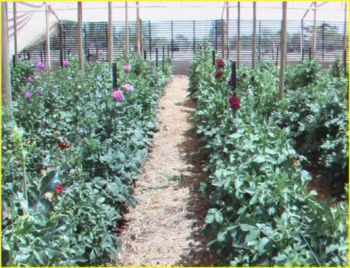
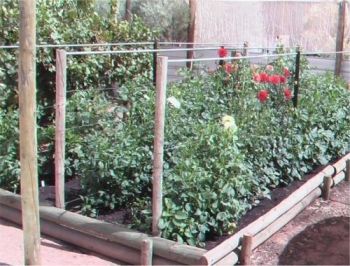
Large Garden on Trellis Small Garden on Trellis
As the plant grows support the plant to your Stake or trellis every 300mm (12 inches)
With my trellis system I find these poly clips excellent especially when the plant is up to 400mm (Two Feet).
As the plant develops into a bigger plant I use a soft string looped around the plant tied back onto the trellis wire. This stops any wind damage.
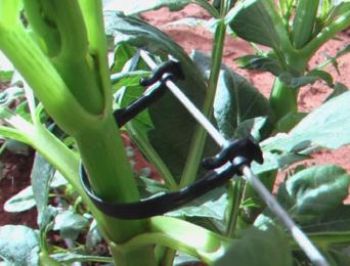
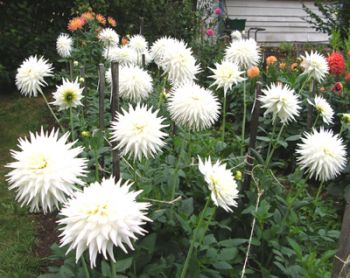
Poly Clip More Laterals - More Blooms
Pruning & Training
When the plants get to approx. 30 – 40 cm (12 – 18 inches) high take out the growing tip.
This will encourage the plant to develop more laterals resulting in more blooms, plus a much sturdier plant and better stems.
The more you keep-up with your dead heading the more blooms you are going to get throughout the season.
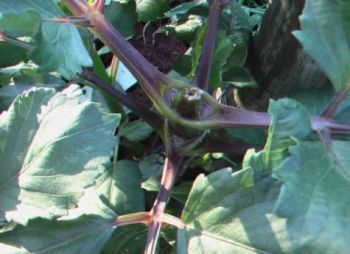
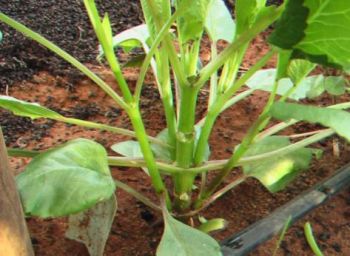
Taking the Centre out Increases laterals Resulting in more Blooms
Cutting Blooms for Inside.
When cutting the blooms, cut the stem at a 45 degree angle, this prevents the stem sitting square on the bottom of your container restricting the supply of Water.
It is BEST to take the water to the plant and adopt
the Pick & Plunge method.
It is best to cut down by at least two sets of leaves; this encourages more blooms & a sturdier plant.
Do not pick them and then walk back into the house because the end of the stem can dry restricting the passage of water to maintain the blooms condition.
I have found that the “Old Wives Tales” of Asprin, Sugar, Condy’s Crystals (potassium permanganate), Vital & Burning/Scolding the Ends do not work as well as “Wet Water.”
The Pick & Plunge method is still best for me.
A couple drops of Bleach (White King) will keep the water fresh.

Enquiries and comments to
John Menzel-
john@winkiedahlias.com
08- 85837369 0408 837369